2. The Basics
Traditionally, handling file uploads was one of the trickier aspects of Web development. Thankfully, these days it's much simpler thanks to frameworks like Laravel. Let's start off by creating a simple file upload form.
2.1. The Upload Form
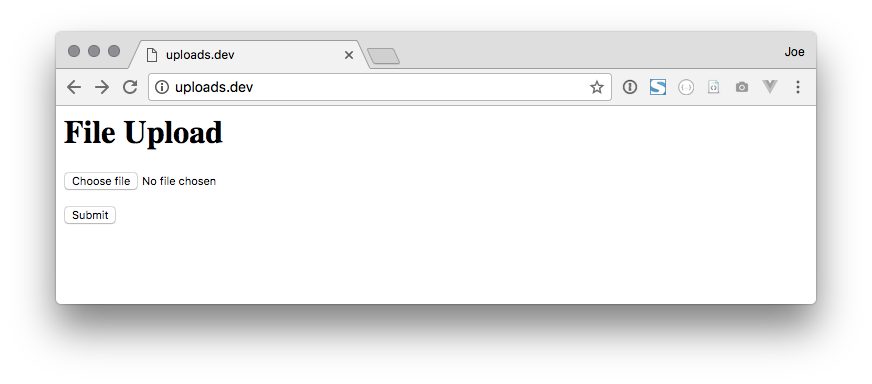
In a fresh Laravel project, open routes/web.php and you'll see that the / route is loading a view named welcome. Let's amend this to include an upload form. Open resources/views/welcome.blade.php and clear out its contents. In its place, add the code below.
<h1>File Upload</h1>
<form method="POST" enctype="multipart/form-data">
    {{ csrf_field() }}
    <input type="file" name="file" />
    <p><button>Submit</button></p>
</form>
Navigate to your project in the browser to see the form in all its glory. Pretty, I know. Now that you have a form, it's time to handle its submission.
2.2. Storing the Uploaded File
If you try to upload a file now, you'll run into a MethodNotAllowedHttpException error. Let's fix this by creating the route for handling the form submission. In routes/web.php add a POST route closure:
Route::post('/', function() {

});
In reality, you'd add this code to a controller method, but for the sake of simplicity let's just stick to closures for now. This function will execute when the upload form is submitted. Laravel makes it very easy to store the file on the filesystem. Within the closure you just created, add the following code:
$path = request()->file->store('public');
The upload form contains a file input field named file. This code looks for file on the request object, which returns an UploadedFile object. We then use the store method to move the uploaded file to a directory named public. If you try to submit the form now, you'll see a blank page - this is because we are not yet returning any kind of response. The file should have actually been uploaded and stored, however, check for it in the storage\app\public directory - by default Laravel automatically generates a new filename for you.
2.3. Retrieving the Uploaded File
Now that you've successfully uploaded the file, let's go ahead and retrieve the file and display it. To do this, the uploaded files need to be accessible via the Web browser. Right now, they are located in the storage directory which is not outside of the document root (i.e. the public directory). As a result, uploaded files will not be reachable by the browser. Thankfully, Laravel ships with a convenient Artisan command for creating a symbolic link that fixes this problem. Run the following command in your terminal:
$ php artisan storage:link
If you look in your public directory, you'll see a storage symlink that points your storage\app\public directory. With this created, you can now access uploaded files via the browser.
Next, let's create a new route to show a file. In routes/web.php add a new GET route closure:
Route::get('show', function() {

});
In this route, we'll look for a query string parameter containing the file path, and use that to retrieve the URL for the uploaded file. We'll then pass the URL into a new Blade template. Add the following code within the closure.
$path = request()->query('path');
$url = \Storage::url($path);

return view('show', compact('url'));
Next, we need to create this view. Create a new file resources\views\show.blade.php with the following contents:
<img src="{{ $url }}" />
<p><a href="/">Upload another</a></p>
Finally, we need to redirect the user to this new route after they have successfully uploaded a file. In the POST route you created earlier, append the following line:
return redirect("/show?path=$path");
Now, head back to the upload form page in your browser. Click on the file input and select an image file from your computer and submit the form. This time, you should see your image displayed, with a link back to the upload form beneath it.
 I'm sure you'll agree, it couldn't be much simpler to handle file uploads than this.
2.4. Validating File Uploads
If you go back to the file upload form and try to submit the form without selecting a file, you'll see a FatalThrowableError that you tried to call a member function store() on null. It would probably be better if we did some validation to catch this problem, don't you think?
At the top of the POST route closure in routes\web.php, add the following code:
$validator = \Validator::make(request()->all(), [
    'file' => 'required',
]);

if($validator->fails()) {
    return redirect()->back()->withErrors($validator);
}
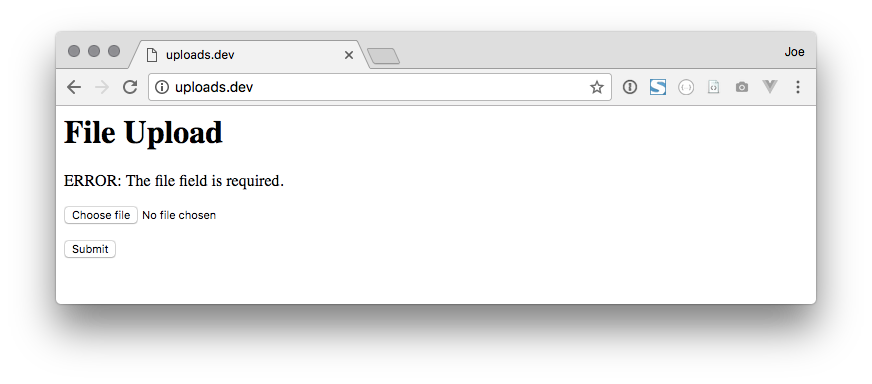
Next, let's display an error message on the upload form if one is encountered. In resources/views/welcome.blade.php just under the <h1> tag at the top, add the following:
@if($errors->count() > 0)
    <p>ERROR: {{ $errors->first() }}</p>
@endif
Now, if you try to submit the form without providing a file - you'll be redirected back to the form and see an error message. There are plenty of other validation rules you can apply to file inputs in Laravel:
between:min,maxThe field must have a size betweenminandmax. These define the bounds of acceptable file sizes and are in kilobytes.dimensionsThis allows you to restrict uploads to image files within the specified constraints. The constraints available arewidth,min_width,max_width,height,min_height,max_heightandratio. When using width and height style constraints you might specify it as follows:'file' => 'dimensions:min_width=640,min_height=480'For ratios, it is expressed as a width divided by height, for example:'file' => 'dimensions:ratio=3/2'or as a float, for example:'file' => 'dimensions=1.5'fileThe field must be a successfully uploaded file.imageThe uploaded file must be an image in one of the following formats: PNG, JPEG, GIF, SVG or BMPmaxThe maximum size of the uploaded file in kilobytes.mimetypesA comma-separated list of valid MIME types for the uploaded file, for example:'file' => 'mimetypes:video/avi,video/mpeg'mimesA comma-separated list of valid MIME extensions for the uploaded file, for example:'file' => 'mimes:avi,mp4'minThe minimum size of the uploaded file in kilobytessizeThe required size of the uploaded file in kilobytes. Note that the uploaded file must exactly match this size, so it's likely that you'll want to use an alternative rule such asmin,maxorbetweeninstead.
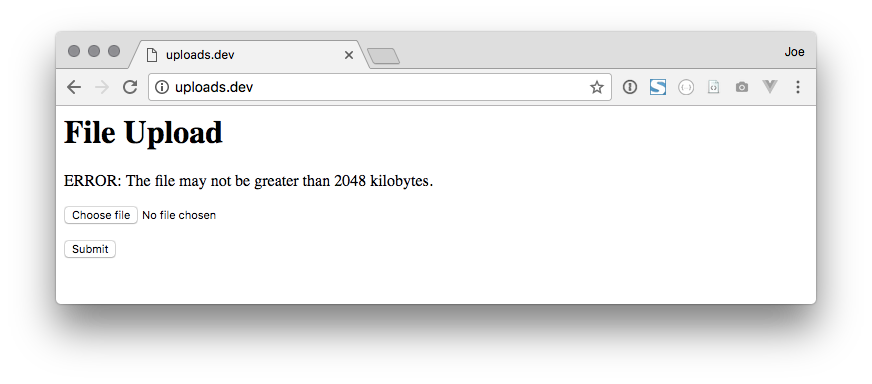
In our case, let's specify that uploaded files must be images with a maximum file size of 2 megabytes. Change the validator to the following:
$validator = \Validator::make(request()->all(), [
    'file' => 'required|image|max:2048',
]);
Now, if you try to upload a file that is not an image, or a file that is larger than 2 megabytes, it will redirect back to the form and display the relevant error message. Laravel's built-in file validation features make it very straightforward to restrict the types of files users can upload in your application.
2.5. Changing the filename
Right now, our app is renaming uploaded files to an automatically generated filename. You may want to change this behavior, and supply your own filenames. Doing so is very straightforward. In the POST route closure, find the following line:
$path = request()->file->store('public');
Replace it with the following code:
$file = request()->file;
$filename = uniqid(time()."-") . "." . $file->extension();
$path = $file->store('public', $filename);
This code generates a unique filename by getting the current UNIX timestamp and prepending it to a unique identifier and concatenating the uploaded file's extension. It then passes this filename as an argument to the storeAs method. If you upload a file and check the storage\app\public directory you'll see that the filename is somewhat different to the previously uploaded files. Of course, you can use this approach to store files however you like - for example you may want to store user files in their own subdirectories or prefix a user ID to the filename - it's up to you.
2.6. Restricting access to uploaded files
Up to this point, uploaded files have been open and accessible to anyone. In many cases, you may want to restrict access to uploaded files to a subset of users. For example, perhaps only logged in users should be able to access uploaded files, or perhaps files should only be accessible to the user who uploaded it. Let's change how we retrieve uploaded files so that we are not serving them directly from the filesystem, but rather through a Laravel route that you can later protect using authentication or authorization as required.
First, let's change the path where uploaded files are stored. Find the following line in the POST route closure in the routes/web.php file:
$path = $file->storeAs('public', $filename);
Change the public string here to private. If you try uploading a file now, it will still work, but on the page that displays the image following upload the image will not display. This is because the file is no longer present in the public directory of your app - it is stored in the storage\app\private directory, to which there is no symbolic link in public.
Next, create a new GET route at the end of the routes/web.php file.
Route::get('file', function() {

});
As with the show route, we are going to pass through the path to the file as a query string parameter to this route. We then need to get the full path to this file and serve up the file itself as a response. Add the following code within your newly created closure.
$path = request()->query('path');
$full_path = storage_path('app') . "/$path";

return response()->file($full_path);
The file method on the response object tells Laravel that you want to serve a file up as the response. Laravel will do the rest of the work like determining what headers to send back such as Content-Type, Content-Length and so on.
Finally, we need to change our show route to send the correct URL for the uploaded file to the view. Previously we just used the Storage::url() method, but this will no longer work as the file is not publicly accessible. Change that line to the following:
$url = "/file?path=$path";
Now when you upload a file using the form, the image will display once again - but this time it will be served by Laravel rather than direct from the Web server. You could easily attach authentication middleware to this route to ensure that only logged in users can view the file. Similarly, if you stored a reference to the user who uploaded the file, you could perform an authorisation check to prevent any other users from accessing it.
2.7. Summary
Hopefully at this point you can see just how easy Laravel makes it not just to handle file uploads, but also to retrieve uploaded files, perform validation and restrict access to uploaded files. In the next chapter, we'll dig deeper into Laravel's filesystem features.